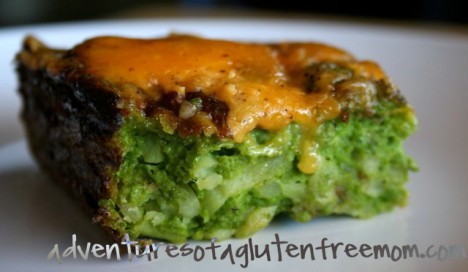
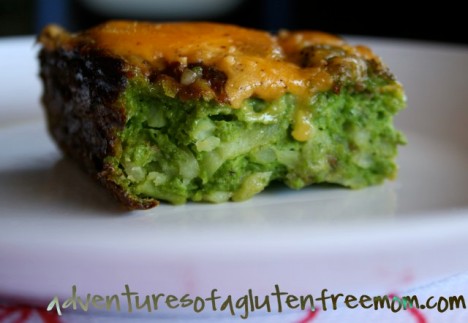
Green Eggs and Ham Quiche

My version was actually Green Eggs and Sausage, but that doesn’t have the same snazzy ring to it as Green Eggs and Ham!  The only reason I even used sausage is because that is what I had on hand for this final attempt at making a quiche (more of a breakfast casserole) for The Gluten-Free Homemaker’s Quiche Challenge.  I have made many a quiche these last few weeks, but they were not well received by my clan.  I think I was getting a little too fancy for them.  The Goat Cheese and Leek quiche I made, received the lowest fanfare (although I liked it!), so an idea came to me to revise the popular school snack my boys have made at their preschool each year during Dr. Seuss week.  I wanted to make a naturally green egg dish to hopefully inspire their teachers that you can make better green eggs, without the synthetic food dye and some added nutrients! 😉

*At the end of this post is a video clip of Dr. Rodney Ford talking about eczema and gluten sensitivity that you might be interested in watching.

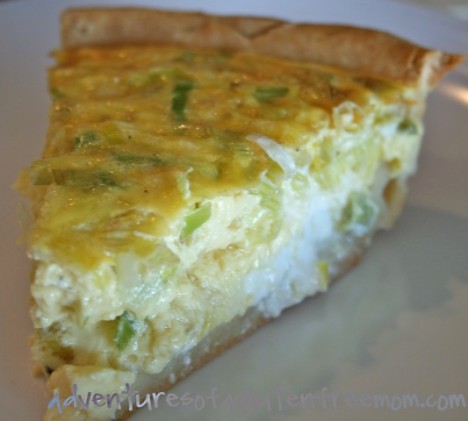
Goat Cheese and Leek Quiche with a Pie Crust Made from Garbanzo Beans! 😀

I wish I had more pictures to share of the steps I went through, but Sam decided to play with my camera and accidentally erased everything, including all the photos of my first experiments with my new BFF, Ms. Vitamix!  Yes, I have made a very large “Note to Self: Dump your camera after each photo session!”

Onward and upward as they say…  I found this recipe and used it as my inspiration for this naturally gluten-free version of Green Eggs and Ham Sausage Quiche!  I omitted the pie crust and went with a hash brown crust, simply because it was easier. 😉

For the crust:

4 cups of Frozen Shredded Hash Browns, thawed

1 Tbs. Oil (I used Grapeseed Oil, but Olive, Canola, etc. would work fine)

Salt and Pepper, to taste

  • Toss together the thawed hash browns, oil and seasonings.
  • Press into a 9 x 13 pan.

For the filling:

8 oz. of fresh spinach (I believe I used more, quite possibly double this amount, but I forgot to to weigh it beforehand.  The fresh spinach came in my CSA box, but it wasn’t labeled with the amount, so I just used it all!)

1 cup Smoked Ham (I used lowfat breakfast sausage)

1 1/2 cups Gruyere Cheese, shredded

10 Eggs (I used fresh, local free-range eggs that I get in my weekly CSA box, it may be in my head, but they taste so much better!)

2 2/3 cups of Milk (I used Skim)

1 cup Heavy Cream (I used Half and Half to lighten it up a bit)

Salt and Pepper to taste (the recipe I used for inspiration called for nutmeg too, but I tend save my nutmeg for pumpkin pie.  Not very evolved of me, I know!)

To make the filling:

  • Add fresh spinach (I did not blanch it, as called for in Nick’s recipe) and eggs to a blender or food processor (I used my Vitamix).  Puree until smooth.
  • Add milk and cream (or substitute) to the spinach/egg mixture and puree until combined.
  • Season with salt and pepper, set aside.

To assemble the Quiche:

  • In the shredded hash brown lined pan, sprinkle with ham (or sausage) and cheese.
  • Pour the spinach/egg custard over the hash brown, ham and cheese layer.
  • Bake at 325º F. for about 55 minutes, then check for doneness.  A knife inserted in the middle should come out clean.

Note: Once the initial quiche was done, there was a Pronounced spinach flavor (remember, I didn’t measure how much spinach I used!).  Once it was done baking, I had to add more cheese, salt and pepper, in order for it to be more palatable for my kiddos.  All I had was sharp cheddar, but it did the trick!!  I added about 1 1/2 cups more of shredded cheese (so much for lightening it up!). 🙂

The boys really liked it and they have been eating a square of it for breakfast each morning this week.  It reheats very well in the microwave.  I will definitely make this again, but I will just be sure to measure out the spinach next time. 😉

Linda is doing a Gluten-Free Cake Challenge for this month and that is more up my alley!  Be sure to check it out for what I am sure will be some very amazing recipes!

Speaking of gluten-free cakes, did you see Jeanne’s Tres Leche Cake over at Four Chickens?  Yummy.

In the spirit of gluten-free awareness month, I want to share a video clip with you of Dr. Rodney Ford talking about eczema and gluten sensitivity.  I posted a little bit about eczema and artificial colorings the other day on my “Funny Oranges” post.  Ron Hoggan, Ed.D., co-author of Dangerous Grains: Why Gluten Cereal Grains May Be Hazardous To Your Health, left a very informative comment to that post last night (thank you, Ron!), that I encourage you to read.  I have solely focused on reading about celiac disease over the past few years, but am starting to read more on the entire spectrum of gluten-sensitivity, and what I have been learning is mind boggling.  For further reading, check out The Gluten Syndrome.net

Funny Oranges

After I got the Breville Citrus Press and started making fresh squeezed orange juice each morning, I found myself knee deep in orange peels.  Instead of throwing them all away, I wondered if I could use some of them for a fun lunchbox treat.  I remembered seeing a recipe for Gelatin Oranges on Disney’s Family Fun website so I thought I would give it a try.  If you or your child has a beef allergy (gelatin), avoid artificial colorings, etc., keep reading…  this gets much better! 😉

These are relatively easy to make (and super easy if you have the Breville Citrus Press to do the juicing work for you!).

Funny Oranges

  • Just slice oranges in half and scoop out the fruit. Be sure to scrape well and remove all the orange pulp, you will want the inside of the orange to be white.
  • To keep the oranges upright, I used a muffin pan to set the oranges in.
  • Prepare gelatin (or substitute, see below) as indicated on the package.
  • Pour gelatin into the prepared orange halves and refrigerate until set.
  • Slice Orange halves and you will have a fun little treat for snacks or to stick in a lunchbox!

The juicer only does so much, I still had to peel the last bit of orange "stuff" out by hand.

Prop the hollowed out oranges in a muffin pan for support.

Pour prepared gelatin into orange halves.

After reading a few of the comments for the Easy Lunchbox Giveaway, I decided to send in tacos for a cool new lunch. Wish I had re-read the comments before I made them as I would have known NOT to assemble the taco the night before! They were pretty soggy come lunch time the next day, LOL! I always seem to learn the hard way. 😉 If you make a taco lunch, be sure to seperate all the components and let your child assemble their own taco at lunch time... this is "much cooler" anyway as they have their own taco bar!

So there’s that version.

I have been doing a lot of reading over the past few months on artificial colorings, dyes, preservatives, etc. and I’m now of the mind that “less is definitely more!”  Just yesterday, I was reading an article in the May/June 2010 issue of Well Being Journal titled, “ADHD Increase Linked to Modern Diet,” by Jane Hersey, pages 16 – 17.  In the article, Jane sited some research by Sanford C. Newmark, M.D., from the University of Arizona Center for Integrative Medicine:

Research has shown a consistent relationship to the intake of artificial colors and/or preservatives on the symptoms of ADHD or hyperactivity.

After describing two large British studies linking food dyes and preservatives with hyperactivity, including one that was published in the Lancet, he concluded,

One can see how the intake of these substances could ‘shift’ in a positive direction the proportion of children diagnosed with ADHD.

The article went on to credit the late Ben Feingold, M.D. for first discovering the link between artificial food additives and hyperactivity.  I just read an article on the Feingold Association website pertaining to ezcema and ADD.  Seems that children with excema are far more likely to develop ADD (Wow, I didn’t know that.  I really encourage you to check out the Feingold Association website, there is some very interesting information on it, that only further demonstrates the negative effects of processed food on our health).  Funny, I had ezcema as a child and was diagnosed with Adult ADD about a year ago.  Luke also suffers from severe ezcema (worse than mine was as a child).  Hmmm…

Another startling fact that was mentioned in the article was the dramatic increase in American consumption of artificial dyes.  Consumption of these dyes has increased almost threefold since the 1980’s, rising from about 6.4  million pounds in 1985 to more than 17.8 million pounds in 2005!!

Last quote from the article that I want to mention, and I think it is very important that all parents think about this:

Newmark pointed out that since more and more families have two working parents, family meals increasingly consist of processed (additive-laden) foods.  “It is hard to know just when a Pop-Tart became an acceptable breakfast, but it often is.  School lunches are abysmal, with an unacceptably high intake of processed foods and [denatured] saturated fats.”

I just looked at my boys after reading the article and thought to myself, “They deserve better.  They have their entire lives ahead of them and I do not want to burden them with health problems (ironically, the very ones I have!), that I can control by simple diet modification.”  That’s right, I am the one who can potentially alter the course of their life and health by taking the time to think about what I am putting into their mouths.  While we already have the benefit of being a gluten-free family (which means we cannot eat most processed foods like Pop-Tarts, but there are obviously still many products like Jello and Koolaid that we can technically have, but probably shouldn’t!).

Needless to say, the rest of my Jello stash went into the trash, as did my remaining Koolaid stash (okay, I’ll admit it…  I was actually the closeted Koolaid drinker! 😉 ).

I have been experimenting with making my own “jello” from natural juice and pectin (the grape turned out to be a kickin’ Grape Jelly without added sugar or HFCS, but it really didn’t taste like Jello.  I have yet to try juice with gelatin, but I have that one on my short list.  I did however, find a really cool new product (new to me anyway) on a recent shopping excursion to my local co-op: Natural Desserts by the NutraDrink Company!!  Check this out from their website:

Natural Desserts’ line of flavored and unflavored Dessert Jels are a truly unique line of gluten free, vegan, dairy free, Kosher dessert jells that are truly indistinguishable from gelatin, yet are manufactured using an exclusive blend of vegetable gums.  Perfect as a simple dessert all by itself, or marvelous for use in the most elaborate mold.

They even have pudding!!  I have yet to find the pudding in my local store, but I am definitely on the hunt. 😀

So, I re-made the oranges with the All-Natural Strawberry flavored Jel Dessert:

This product is still high in sugar, so moderation is key.

We really liked these quite a bit, even though Sam is still hung up on the green Jello. Wonder if I could make a spinach/apple combo juice and just add the unflavored Jel for a natural and healthy green color?? He might disown me... but it's worth a try! 😀

Update: At the suggestion of Deanna, I just submitted this recipe to the May “Go Ahead Honey, It’s Gluten-Free” monthly recipe roundup (it’s a Jello theme for May), being hosted by Mrs. Ed’s Research and Recipes.  This is my first time participating in this monthly event and I am so happy that Deanna mentioned it to me, because it introduced me to a new blog that I am excited to read.  Anyone can participate in this blog carnival, you do not need to be a blogger to join in on the fun!  The “Go Ahead Honey, It’s Gluten-Free” blog carnival was created by Naomi Devlin over at “Straight Into Bed Cakefree and Dried.”  What a fun way to make cooking at home an even more rewarding experience.  It’s like sitting at the kitchen table, swapping gluten-free recipes and the stories behind them, with great friends over a hot cup of coffee.  🙂

Gluten-Free Eggless Meatballs

Maybe I should have called them “Eggless Meatball Wonders,” or “Guiltless Meatballs,” because there are several nutritious ingredients cleverly hidden inside, and you cannot even tell! 😉

Ever since I started experimenting with “flax eggs,” I have become increasingly impressed with the results in most of my experiments.  So much so, I have found myself buried in excess eggs that I have delivered in my CSA box each week!  That’s okay though, I have some quiche to get working on for the Gluten-Free Quiche Challenge over at The Gluten Free Homemaker!

Flaxseeds are a good source of Omega-3 Fatty Acids, Manganese, Dietary Fiber, Magnesium, and Folate (I highly recommend checking out the World’s Healthiest Foods website, there is a lot of great information on it, especially for people like me who do not have a degree in nutrition!).

I was inspired to seek out a recipe for eggless meatballs for a friend who has a child with an egg allergy and I finally settled on a “rough” recipe from another mom’s post on the Spiffy Moms forum.  Tamika’s recipe hooked me because of the oats.  Growing up, my mom always made meatloaf with oats instead of breadcrumbs, which I really like because it is much more moist than the breadcrumb version of meatloaf.  Using Tamika’s ingredients as a guideline, I made my own adaptation which also included shredded carrots and zucchini.  There is a trick to making the shredded veggies work though, which I highly recommend to avoid any “texture” issues!  Once you compile all the ingredients, throw everything in a food processor and pulse until combined.  The oats and veggies get pulverized into microscopic bits and you cannot tell they are in there!  My boys LOVE these!!

Eggless Meatballs

1 lb. Ground Beef or Turkey (I used Ground Bison)

1/2 cup Oats (I used Certified Gluten-Free Oats)

1/3 cup Grated Parmesan Cheese (or Dairy-Free Substitute)

1 Flax Egg

2 Tbs. Milk (or Dairy-Free Milk Substitute)

1 tsp. Plain Vivagave Inulin Powder (Adding the fiber supplement is optional. I used Vivagave because it is gluten-free, has zero taste or texture and a full serving size (1 Tbs.) has a whopping 10 grams of fiber!)

Assorted Seasonings (Feel free to experiment but I just used 1 Tbs. dried Italian Seasoning, 2 cloves of fresh minced garlic and a pinch of salt, as I am a low-salt person, so adjust according to your taste preferences. Just keep in mind that whatever sauce you use will have salt and seasonings too).

1/2 cup shredded Carrots

1/2 cup shredded Zucchini

1 – 2 Tbs. Olive Oil for cooking

  • Combine all ingredients (except the olive oil) then put in a food processor and pulse until combined, it will somewhat resemble a paste.
  • Pinch of small pieces and roll to form meatballs.
  • Cook in a large skillet with olive oil over medium heat until cooked through.

I like to make these in large quantities and freeze them.  This way, I can just grab what I need and toss into some pasta sauce as it is cooking for an almost effortless gluten-free meal! 😀

Please forgive my dark photos, we had tinting placed on all our windows last week as the sun is really intense here in the high desert! I am going to have to figure something out, but until then… bare with me 🙂

I start by making the flax egg first:

1 Tbs. Ground Flaxseed.

I added 3 Tbs. Water

You will have a watery mixture at first.

After a minute or two, the watery mixture will congeal and have the texture of an egg white.

i used 1 lb. Ground Bison

Add 1/2 cup Oats

Add 1/3 cup grated Parmesan Cheese

This is optional, but I added 1 tsp. Vivagave Inulin Powder for added fiber.

Add the Flax Egg. You can see the texture better in this photo.

Add your desired seasonings.

Add 1/2 cup shredded Carrot.

Add 1/2 cup shredded Zucchini

Add the combined mixture to a food processor and add 2 Tbs. Milk then pulse.

You will have an interesting looking "paste," but don't worry!

Shape meatballs and cooking in a skillet with added olive oil, over medium heat until cooked through.

Click here for a guide to internal cooking temperatures, beef is 160° F., turkey is 165° F. I cannot recommend getting a good cooking thermometer enough! I recently bought a new one at my local Restaurant Supply Store for around $25, and so far I am very impressed (my OXO didn’t last but a few months).

Once the meatballs are done cooking, I drain them on a paper towel. I then place the meatballs on a cookie sheet, uncovered, and place in my deep freezer for a couple of hours until they are frozen solid. I store them in a Freezer Ziploc bag and usually use them within a month (at most). Mike has been enjoying meatball subs again and Sam and Luke like to stick the cupcake picks in the meatballs and just have them for lunch. They are even coming up to me and asking, “Mom, may we please have “appetizers” for lunch?” LOL!

See? No "detectable veggies!"

Sam wanted me to show his creation… the tree is from the Monster Truck Cake I made a few weeks ago and he stuck it in his meatball. Love it!

Gluten-Free Happy Meals

I originally posted this last summer, but I thought I would do an update with better pictures.

Last week, I took the boys to see “How To Tame Your Dragon” (a really GREAT movie by the way)! I loved the underlying message of the movie and thought it very appropriate for Sam, who has been struggling this school year to accept the things that make him “different” among his peers. I thought this movie was the perfect representation of the concept that “different” is not synonymous with bad, wrong, unworthy, etc. It was a good self-esteem builder for Sam (as it played out in his language). Click here for a website that Mike found, called Movie Mom. Nell Minow does a good job of breaking down movies to help parents decided if they want to take their child to a particular film.

Sam is 6 and Luke is 2 1/2 and I took both of them. Sam had no problems and didn’t even catch the “breastplate” comment. Luke was only half interested in the movie because I bought him a package of M&M’s (NOTHING trumps chocolate with that child!). Luke did manage to wear the 3-D glasses throughout most of the movie and only commented a couple of times that “the dragons are loud.”

ANYWAY, the reason I brought up the movie is because I treated the boys to a “mama-made” Happy Meal after the movie, complete with the “How To Tame Your Dragon” toy that is currently being offered at McDonald’s. I am catching on to their marketing techniques to children! It is ALL about the packaging and the toy for kids. Well, at least for my 6 and 2 year old!

Well, I can play that game too! 😉

So here is how I do it. Every now and then I go to McDonalds (always at an off time like 3 pm, because this confuses the heck out of the staff! “You want a Happy Meal with no food but all the boxes???” YEP!) I like to buy about 10 at a time so I have enough for Sam and Luke to get 5 each over the course of a few months (it’s a TREAT, not a staple!). With the Happy Meal packaging (including the chicken nugget boxes, french fry sleeves, cups, lids, etc.) and all 10 toys, it costs about $16.00, give or take. I then take the stuff home for assembly and storage (the extras store nicely in a 2 gallon HEFTY Storage Bag).

The "Loot."

It had been a long time since I have been into McDonald’s and I couldn’t help but notice the messages on the bags:

Have you seen this yet experiment yet? I’m not convinced the fry “Gold Standard” is all about the potato varieties!!

Please define "pure" beef for me.

Gotta love marketing! If I hadn’t been watching all these food documentaries (and if I actually ate at McDonald’s, which I don’t because it is not a risk I want to take for myself or Sam with celiac disease), then I would probably be swayed into believing that what I was eating was the picture of fresh, “real” food! (I love the add-in of suggesting your favorite All-Natural Newman’s Own salad dressing… makes you think everything else is “All-Natural!”

Oh boy, I’ve gotten myself started! Let me get back to the Happy Meal before I gross myself out! 😉

All the “must-have” components for a “mama-made” gluten-free Happy Meal!

I get it ALL, down to the napkin!

I'm surprised that with the "All-Natural" image it seems McDonalds is trying to project, that they would still be using a ketchup with HFCS! But I guess they don't count on folks reading the microscopic ingredient labels, (or that one gluten-free blogger mom would use the zoom lens on her camera to post it on the web, LOL!) ;-D

Lately, for the fries, I have been using Ore-Ida’s Extra Crispy Fast Food French Fries (which I bake, not fry). I am not saying or even implying that these are “healthier” than McDonalds French Fries, but they don’t appear (unless there is some “hidden source” I am not away of) to contain TBHQ or Dimethylpolysiloxane like McDonalds does. I am flying blind here and educating myself on Wikipedia, so if this information is wrong, please let me know. I have no “hidden agenda,” I am just a mom who wants to make better choices for her family. It is difficult when you have zero formal education to help you understand this stuff!

For the chicken nuggets, I use Allergy Free Foods Chicken Nuggets, which are not only gluten-free, but they are dairy-free, egg-free, peanut-free, soy-free, and tree-nut free too! You can buy these in smaller units at The Gluten Free Mall. I used to buy them on QVC, but they are no longer available there. The Allergy Free Foods Chicken Nuggets are really good “kid style” chicken nuggets, even I love them! They are not cheap though so I use them for special occasions like GF Happy Meals!

I only buy Happy Meals when they are available in the box, because that is what I remember getting growing up… not the bag! Sam and Luke like to wear them as hats for some reason…

Sam has finally weaned off of the “Sweet & Sour” sauce that he liked from his gluten-days and ketchup works just fine now. Normally, I only buy Whole Food’s 365 Organic Ketchup… it is so good!

Don’t forget the toy!

Have you seen “Supersize Me?” We saw it back in October for the first time and I guess that was the beginning of my decent into “food madness,” so to speak!

If you are interested, check out the trailer:

You can see the entire documentary here for free!

The next film I saw was Food, Inc.:

Then the next, King Corn:

Needless to say, I feel rather awkward making this post, based on what I now know.  However, I have a 6 year old and a 2 1/2 year old that I have to keep in mind.  I struggle everyday with making these “copy cat” versions of the “new American” comfort foods that come in a box or can be “nuked” in 2:30, if stirred once at 1:30 (you know what I mean if you understand that jargon!).  WHAT HAPPENED TO OUR FOOD?!?!  We simply cannot do nothing any longer.  I for one have decided to embrace the competition and accept it for what it is: powerful, well-financed, and politically connected.  I can either complain about how I wish it were different (which it will never be) or Mike and I can teach our boys the difference between the TOY and the FOOD!  And sometimes I think about how this great life lesson will translate into later morality tales.  What a great introduction into the difference between marketing versus substance.  As Mike likes to say, “Good suits cost money,” and that is true.  You get what you pay for, and good food costs money, and it doesn’t come from the drive-up window…it comes from Momma’s kitchen!!  And regardless of what anyone says, MOMMA JUST MADE A QUASI-HEALTHY GLUTEN-FREE HAPPY MEAL!! 😉

I believe you have to meet people where they are. Two steps closer is usually better than one step behind.

P.S.

Thank you to McDonalds for selling me the Happy Meal components so I could make this post.  Please do not put a “DO NOT SELL TO THIS WOMAN” photo behind all of your cash registers in America. 😀

Gluten-Free Pizza Lunchables

So you knew “it” had to be coming at some point, right? 😀 I must say this first, Mike and I are REALLY working with Sam to embrace his “differences” (as we all have them), and I think it is starting to catch on. He is not asking for GF Lunchables all that much anymore (YEA!!) but it is nice to know that if I need one for a deposit in his self-esteem bank, I can do it!

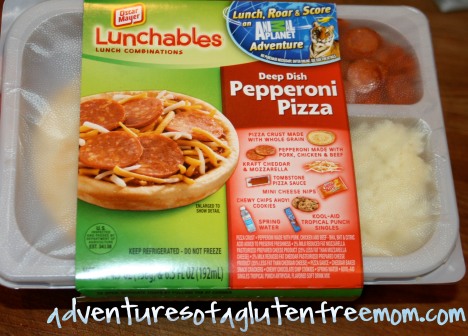
So here is what I did, I got the Lunchables in the Green package (they are easy to disassemble so you can throw away the offending gluten components, then clean and reassemble and slide the wrapper back on so it looks almost store-bought, the Press’n Seal kind of gives it away, but that’s okay.)

Another GREAT Udi’s gluten-free product… pizza crust! I love this thin crust and it is super easy in a pinch! Here is how I normally make mine: I place it in the oven, directly on the rack, in a preheated 425° F. oven for about 5- 6 minutes. I then add my toppings and place back in the oven, on the rack, and heat for an additional 6 minutes or so. This keeps the crust nice and crispy, which is how I like it!

For the GF Pizza Lunchables though, I did not cook it (keeping with the Lunchables theme…). The Udi’s pizza crust is actually quite tasty when simply thawed to room temperature! I might have to try these to make GF “pita” chips! After I thawed the crust, I went on a scavenger hunt to find the right size cookie cutter to fit the Lunchables tray section.

I settled on a large cup.

Cut out your crust, then freeze the remaining portion… I will figure out something to do with it and post an update later… no waste! 😉

For the cheese, I just used shredded mozzarella. For the pepperoni’s, I used Hormel’s Pepperoni Mini’s, which I found a huge bag of at Costco.

I tossed out the Tombstone Pizza Sauce Packet that came in the Lunchables because I could not find any solid information on the ingredients, processing, etc. and opted for filling a little disposable container that I snagged from a recent dinner at Boston Market (and in case you didn’t already know, Boston Market’s Poultry Gravy is Gluten-Free). 😉

Now here is an example of one of “those” product labels that are just downright confusing! When I bought it, I did so (sheepishly) because I only targeted one section of the label:

So my husband called me one day when I was out and about to ask me if I had bought this by mistake because he targeted this section of the label:

This is a two photo shot, it’s hard to take a picture of some labels!!

Huh.

So let me ask you, would you take the risk and buy this product, just based on the label information??

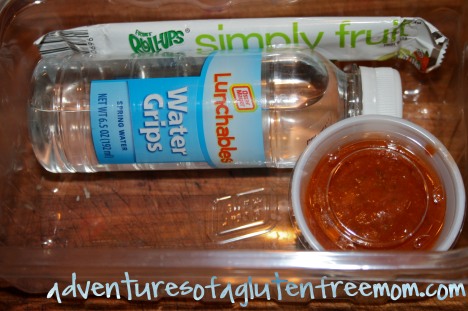
Bottom compartment of the GF Pizza Lunchables: the water is the only thing I kept from the original Lunchables components.

And there you have it!! A Gluten-Free “Mom” Pizza Lunchables! 😀

Now, just in case you are interested, check out the ingredient label for the Original Lunchables “edible” components:

Holy Moley! You know what’s funny? Truth be told, if Sam and I did not have celiac disease, I would probably have bought these for him!! Before my gluten-free journey began 5 years ago, the furthest I went into “label investigation” was to the fat and calorie content!! I didn’t understand ingredient labels back then and I am only marginally better now! I always assumed that if it was sold as “food” in the grocery store, it “must” be safe, right? LOL! Have you watched Food, Inc. yet??? IF you haven’t, it will be airing on PBS on April 21, 2010. I viewed it for the first time back in December, and it set my view of the food world on fire. There is something more to this movie, that I think celiacs and folks with food allergies and gluten intolerance, in particular, might see as a “not as obvious correlation” to this film. Maybe it is just me, but I am curious as to what others think…

Do you know what your child’s daily maximum intake of salt should be? And believe you me, I know that my “assembled” gluten-free pizza Lunchable is probably not much better, it any at all. This is why I am hoping and praying that SOMETHING is changing. Between this economy (people eating at home more or packing their lunch) and Food, Inc. and Jaime Oliver’s Food Revolution (more awareness)… that packing healthy sack lunches (or even if schools get involved by gardening, etc. and kids can “see” what real food looks and tastes like… kids are highly influenceable, they WANT WHAT THEIR FRIENDS ARE EATING!!!! If one’s friends are eating healthy whole foods, then it is cool! Not to mention… most whole foods are naturally gluten-free! 😉

Udi’s Gluten Free Bagels & A Fun Breakfast Treat for GF Kids

A few weeks ago, while on one of my rare grocery adventures (I kid you not, I get lost in label land)! Anyhoo, after a few hours of doing the “Gluten-Free Nancy Drew” thing, I remembered that I needed to pick up some more bread. When I approached the freezer case to get my beloved Udi’s GF Bread, I just about fainted. There they were. The ever elusive, softly whispered, government conspiracy cover-up… UDI’S BAGELS!!

I was so excited, I bought 5 packages!

As soon as I got home, I had to have one, with cream cheese!

The first thing I noticed as I pulled a bagel out of the bag… these are REALLY BIG bagels! They are so big, that I could only eat 1/4 of it! The other thing I noticed is that they do not really taste like the gluten bagels I remember. They are good mind you, but they are not the boiled bagels that I think of; with the crunchy crust and chewy inside. To me, they are the same as Udi’s great gluten-free bread, only in the shape of a bagel (which is a big plus, especially for a 6 year old)! Sam loves the bagels, because they make him feel “normal.” Know what I think these are? A GREAT gluten-free hamburger bun, only with a hole in the middle! Just place a piece of lettuce at the top to keep the condiments contained and wa-la!

Told you they were big! Sam will not eat lettuce on his burger, but it wasn't too messy!

I got this idea from Disney’s Family Fun Magazine, UFO Breakfast Treats!

That's my boy, thinking "outside the box!"

Why can't he be this "neat" with chocolate??

Neither one of my boy’s will eat a hard boiled egg (yet they love egg salad??).

I hope you have a happy Easter or I hope you’ve had a good Passover!

((Hugs)),

Heidi

Easy Lunchboxes Update

You are gonna LOVE this!

I signed up for the Easylunchboxes.com Newsletter after I totally fell in love with this lunch box system and guess what I found in my email inbox today??

A Newsletter!

Warning: You MUST laugh at my joke, even though it really isn’t funny, or even a joke for that matter. I am delirious from making 1,000 gluten-free Goldfish Crackers (Kindergarten class project), plus some gluten-free “Nilla Wafers” and sugar cookies for Sam’s Friday Fun Snack (they are building “Cat In The Hat” cookies), PLUS this weekend is my mom’s birthday and my mom-in-law’s birthday is shortly thereafter, not to mention I am going on a double date Saturday for my BFF’s 40th birthday so I better make her a cake (I am WAY younger than her, like 20 years younger!). Before you begin to think otherwise, re-read my previous warning.) I am also baking GF cupcakes for Luke’s preschool Easter celebration and I totally forgot that I signed up for a “Stage Cakes” decorating class on Saturday morning, so that is 3 more GF cakes!

Oh yeah, the newsletter mentioned an upcoming sale, on one day only, for…

up to 70% OFF!!

Click here for more information!

Glazed Doughnuts

I made these doughnuts a few weeks ago for Sam’s Flag Ceremony at school. His class was in charge of the ceremony and his teacher was going to buy doughnuts for the class to have as a treat afterward. Mind you, this was during the same period of time as the “Magic Wand” Friday Fun Snack and my fall from grace as I found myself squeezing pretzel dough out of a play dough toy. It was a rough week so I set aside a doughnut for me to have with a cup of coffee and a splash of Bailey’s… okay, my Bailey’s with a splash of coffee. Fine, my mug of Bailey’s! 😉

I got the recipe off of the Williams Sonoma website and subbed the flour with Better Batter Gluten-Free Flour.

Glazed Doughnuts

3/4 cup Warm Milk (about 110ºF) (or Non-Dairy Substitute)

1/4 cup Granulated Sugar

1 packet Active Dry Yeast (or 2 1/4 tsp. Bulk Yeast)

2 1/4 cups All-Purpose Flour (I used Better Batter GF Flour)

1/4 tsp. Kosher Salt

2 Tbs. Unsalted Butter, at room temperature (I used Smart Balance, Earth Balance would also work)

2 Egg Yolks

Nonstick Cooking Spray

Vegetable Oil for Frying

For the chocolate glaze:

5 Tbs. Unsalted Butter (I used Smart Balance, Earth Balance would also work)

4 oz. Semisweet Chocolate Chips (You could also use Vegan Chocolate Chips, or Carob Chips)

2 cups Confectioners’ Sugar (I used 365 Organic Powdered Sugar, which is corn-free)

1 1/2 tsp. Vanilla Extract (Make sure it is GF)

1/4 cup Hot Water

Vanilla Glaze Variation:

To make a vanilla glaze, follow the instructions for preparing the chocolate glaze, omitting the chocolate chips and decreasing the hot water to 3 Tbs.

  • Pour the warm milk into a small bowl. Stir in the granulated sugar and yeast until dissolved. Let stand until the yeast activates and thick foam appears, about 10 minutes. (I started the yeast process before assembling all my other ingredients. I turned my oven on to 200° F. and allowed the oven to come to temperature, then I turned off the oven. After incorporating the yeast mixture, I opened the oven door and placed the bowl of yeast on the door of the oven to proof. This gave the yeast the necessary warmth to help it activate, without overheating the yeast and consequently “killing” it).
  • In a bowl, whisk together the flour and salt. Make a well in the center and put the butter, egg yolks and yeast mixture in the well. Using a hand mixer fitted with the dough hook, beat the dough on medium speed until it comes together and forms a ball, 3 to 4 minutes. Cover the bowl with plastic wrap and let the dough rise in a warm place for 1 hour. (I used my stand mixer, but you could also do it by hand, and build some muscle while you’re at it!…Build some for me too, will ya!)
  • Lightly grease a baking sheet. Transfer the dough to a lightly floured work surface and roll out 3/8 inch thick. Using a doughnut cutter, cut out doughnuts. Transfer the doughnuts and doughnut holes to the prepared baking sheet, spacing them 1 inch apart. Re-roll the dough and cut out more doughnuts. Spray the tops of the doughnuts and holes with nonstick cooking spray and cover with plastic wrap. Let stand in a warm place until the doughnuts and holes have almost doubled in size, about 30 minutes.
  • In a deep fryer, heat oil to 350ºF according to the manufacturer’s instructions. Line a baking sheet with a wire cooling rack.
  • Working in batches of about 6, fry the doughnuts and doughnut holes until lightly golden brown, about 1 minute per side. Transfer to the wire rack-lined baking sheet and let cool for 10 minutes before glazing.
  • To make the chocolate glaze, fill the bottom pan of a double boiler with 1 inch of water and bring to a simmer over medium heat. In the top pan of the double boiler, melt the butter and chocolate chips. Remove from the heat and whisk in the confectioners’ sugar, vanilla and hot water until combined. Set the top pan over the simmering water and keep the glaze warm until ready to use.
  • Dip the doughnuts, one at a time, into the warm glaze, covering the top half of each doughnut with glaze. Place the doughnuts, glazed side up, on the wire rack and let the glaze set for 10 minutes. Repeat to glaze the doughnut holes. Serve immediately. Makes about 14 doughnuts and doughnut holes.

Not 110° F., but close enough

Add warm milk to the sugar,

add yeast,

stir to incorporate.

This is what the yeast mixture looks like after setting for 10 minutes in a warm place.

See how “poofy” the yeast mixture is? If your yeast does not look similar, throw it out and start over! It doesn’t “hurt” as much to throw out a few cents worth of yeast and sugar as it dos to throw out a few bucks worth of GF flour!!

A tip with eggs (in case you are like me and when you crack an egg on the side of a bowl, the shell goes right in your mixture!), use a knife and give the egg a good “whack,”

Nice, clean crack.

Is it just me, or does my thumb look like a chicken leg?? 😀

opening the egg is a breeze,

Let the egg white slide off into a bowl, while keeping the yolk in the shell. Did you know that you can freeze eggs?

1/4 tsp. Kosher Salt,

2 1/4 cups GF Flour (Better Batter for me),

add salt to the flour

Whisk to incorporate the GF flour and salt,

I also like to add another step, by sifting the flour /salt mixture. Personally, I think a flour sifter is a waste of money, a fine strainer works just as well plus it is faster and cheaper!

After adding the flour to the strainer, I use the handle of a wooden spoon to “stir” the mixture through.

add the butter,

and the egg yolks,

then mix to mix to combine. I used the dough hook on my stand mixer.

Wrap the dough in plastic wrap, then set aside in a warm place (I used the oven) to rise for 1 hour.

Risen dough.

Place the dough on a lightly floured surface,

With Better Batter, you can pick it up! Sorry, I am still amazed at this! 😀

Using a biscuit cutter or a glass, etc.,

cut out the doughnuts. Don’t forget to cut out the centers too!

Place cut doughnuts on a cookie sheet,

I like to cover mine with a damp towel then place in a slightly warm oven (make sure the oven is turned off!).

“Risen” doughnuts,

Place doughnuts in hot oil (350° F.), and allow to cook for about one minute per side.

After allowing the doughnuts to cool for a short time, dip one side in glaze (chocolate or vanilla). Top with sprinkles if desired.

The boys loved these… fresh. The next morning (when Sam needed to take one for school), the doughnuts were a lead balloon. Keep that in mind before making these! (In case you are wondering, Sam and Luke are helping Mike get our grapes planted).

I think Sam was in shock…

this reminds me of the “Crave Cheesecake Incident”

I mean nothing by this… but only a child with a dietary restriction can understand the look on Sam’s face at this moment!

This look, makes every backbreaking moment…worth it.. 😉

“Tricky” Chocolate Pudding

I blame this recipe for my youngest child’s O.B.S.E.S.S.I.O.N. with chocolate!

Luke was my smallest baby, at 7 lbs. 13 ounces and 21″ long. That may not seem “small” for a newborn, especially one that was born 2 weeks early, but Sam was 9 lbs. and 23-inches long! Sam never lost an ounce after he was born like most newborns tend to, but Luke did lose weight, almost a full pound! Luke stayed on the small side for quite sometime and it was a struggle to get him to gain weight (one of the many “signs” that I thought he had celiac, not Sam).

2007

Anyway, I was on heightened celiac alert after Luke was born and on the advice of his pediatrician (based on the information at the time), we delayed introducing gluten to Luke until he was 1. Lots of commercial baby foods have gluten, so I started making my own baby food. That was the beginning of my “make my own” era! I got Jessica Seinfeld’sDeceptively Delicious” cookbook and got to work. It was during this time that I actually picked up the tip to freeze purees in ice cub trays, and I still use that trick for my GF Condensed Soup components!

One of the recipes that I first tried and was blown away by the results, was the Chocolate Pudding recipe on page 159. This was especially helpful for helping to put weight on Luke because of the healthy fats. Click here for more nutritional info on avocados. I found a very close copy of the recipe on another website, so I will link to that, but I originally got the recipe in Deceptively Delicious. The only thing different is the missing added cornstarch from Jessica Seinfeld’s recipe. I did not use the cornstarch either just to see how it would turn out, and I think that is the reason the pudding was so shiny. Taste-wise though, I think it is better without the added cornstarch.

“Tricky” Chocolate Pudding

1/4 cup Trans-Fat-Free Soft Tub Margarine (I used the Soy-Free Earth Balance, which is also gluten-free and dairy-free. You could also use Palm Shortening).

1 cup Avocado Puree (about 2 large) make sure they are very ripe! (Of the 6 avocados I had, only two were in good enough condition to use, so I had slightly less than a cup of avocado puree. If you use ripe avocados, just smash them up really well with a fork to make the “puree” or you could throw them in a blend or food processor).

1 cup Confectioners Sugar (I used 365 Organic Powdered Sugar which is corn-free).

1/2 cup Unsweetened Cocoa Powder (I used 1/4 cup Hershey’s Cocoa Powder and 1/4 cup of Hershey’s Special Dark Cocoa Powder)

1 tsp Pure Vanilla Extract

  • Melt the margarine in a medium pan over low heat.
  • Mix avocado puree and melted margarine in a small food processor or blender until very smooth. (I omitted this step).
  • Return to pan and add sugar, cocoa powder and vanilla. Cook about 3-4 minutes until it thickens.
  • Serve warm. (Luke likes this cold too!).

Melt the butter (or butter substitute),

Mash up 1 cup of ripe avocado (or thereabouts),

add the cocoa powder, powdered sugar and vanilla,

and there you have it!

This is REALLY GOOD pudding! You cannot tell there is avocado in it!! The texture is thicker and creamier than a dairy-based pudding mix. It’s kind of like a fudge brownie batter, if that makes sense. But in case you are not convinced…

Exhibit A:

Does this look like a face that would lie to you? If you are not convinced of that, click here, and check out the last photo.

Now do you believe me? 😀

Gluten-Free Powdered Donuts/Doughnuts

These taste just like the "Powdered Donut Gems" I remember from my gluten days!

Whether you spell it Donut or Doughnut, they both represent the same thing. Whether you are a Dunkin’ Donuts type of donut person or a Krispy Kreme Doughnuts type of doughnut person, it doesn’t matter because if you are gluten-free like me, you cannot have either! 😀

Back in December, I had to figure how to make powdered donuts for one of Sam’s Friday Fun Snacks, they were making snowmen from them. I needed 2 standard looking powdered donuts (with the hole in the middle) and one powdered donut hole. I had never made donuts before so I took a crash course on YouTube! Seriously, YouTube has some great videos of people doing just about any kind of cooking. Most videos are made using gluten ingredients, but you can pick up tips on how to do certain things (I have recently been watching some videos on how to makel egg rolls!) Anyhoo, before I could start cutting the donuts and frying them, I needed a good gluten-free recipe!

I hit the ball out of the park on my first try when I struck gold by finding this recipe on the Four Chickens blog, (although Jeanne, the author, has 5 chicken now!). I love Jeanne’s blog, she has some really great recipes! I know she is working on a raised donut recipe, so I am not even going to try, I will just wait for hers! A little info on Jeanne before the recipe/photo tutorial. The following is an excerpt from the Four Chickens website, in the “about me” section:

I have 1 daughter, 1 husband, 5 chickens, 1 organic garden in a constant state of disrepair, 100 million books, 10 million skeins of yarn, 5 million cookbooks, 2 million projects in progress rolling around the house, and 1 PhD in theatre history/theory.

I am gluten-intolerant. I also have a life-threatening allergy to wheat. My daughter has a life-threatening peanut allergy. This combo platter keeps life interesting, to say the least.

I make fabulous gluten-free baked goods and it’s my goal to help others do the same.

The reason I had to post this is because the first paragraph is SO me (without the PhD), which is probably why I like Jeanne so much! 🙂 I was just reading this post of Jeanne’s, and I thought it was great. The second paragraph is hysterical, because it is so true. I annoy the heck out of people when they go out to eat with me, because I show up with my camera! I am like Jeanne though, I fall into the “others” category too in regards to having beautiful food pictures that are like pieces of fine art (like Karina’s!). I do not even know how to use my camera, the pics from my Better Batter review were a fluke of nature! 😉 In the post, Jeanne links to a great video on a food photography workshop she attended (see the end of the post), and I highly recommend viewing it, if for no other reason than to see what goes on behind the scenes!

One last thing on Jeanne that I want to share, Jeanne has a recipe on the National Museum of American History’s blog, in the “Julia Child Recipe of the Week” section for Chantilly Meringuée or Elegant Ice Cream. I love Julia Child, she was a wonderful teacher who always seemed genuinely humble as evidenced by her willingness to show her many mistakes as well as many successes with her audience. She was real and made me feel as though I could cook that way too. Check out Jeanne’s blog, I am sure you will love it as much as I do!

Anyway, on to the Powdered Donuts. I used a different blend of flour than the one Jeanne has posted on her blog because I already had some made up from the Christmas Eve Fritters I had been experimenting on. I used this flour blend that I found on Recipezaar. I will re-post it here too with the changes I made.

I Can’t Believe It’s Not Gluten! Gluten-Free Cake Flour Mix

3 cups Brown Rice Flour (fine ground) (I used Authentic Foods Superfine White Rice Flour, since I was out of the Superfine Brown Rice Flour. I cannot stress enough how much of a difference the superfine grain makes over the standard rice flour, no grittiness!)

1 cup Potato Starch (not potato flour)

1/2 cup Tapioca Flour (I used Expandex Modified Tapioca Starch. The word “flour” is used interchangeably with the word “Starch” when referring to Tapioca, this is NOT the case with Potato Starch and Potato Flour, they are two VERY different things).

1 1/4 teaspoons Guar Gum or Xanthan Gum (I used Xanthan Gum)

  • Sift ingredients together, combining thoroughly. Use in place of flour in cakes and other baked goods.
  • Store in airtight container or Ziploc bag in refrigerator.

Gluten-Free Powdered Donuts (Gluten-Free Doughnuts recipe reprinted courtesy of Jeanne Sauvage, author of Four Chickens. My changes/suggestions are in red.)

1 Egg, lightly beaten (I have also tried these with Ener-G Egg Replacer and they work fine, just a little more dense)

1/2 cup Milk (or dairy-free substitute)

1/2 cup Sugar

2 tsp. Baking Powder

1/4 tsp. Nutmeg

1/2 tsp. Salt

1 Tbs. Butter (I used Smart Balance, but Earth Balance (dairy-free) would also work fine)

1 3/4 – 2 cups Gluten free Flour Blend (Jeanne uses 1 3/4 cup of her flour blend, I used 2 cups of the flour blend posted above. Start with 1 3/4 cups, then add more if needed. You can always add, but you cannot take away. 😉 )

Oil for frying (I used Sunflower Oil)

For powdered donuts, you will need confectioner’s sugar. Whole Foods’ 365 brand of Organic Powdered Sugar uses Tapioca Starch instead of Cornstarch, if you avoid corn. You can see a photo of it here.

Or, you could roll the donuts in Granulated Sugar or a Cinnamon/Sugar mixture.

  • Mix together egg, milk, sugar, baking powder, nutmeg, salt, and butter in a medium bowl.
  • Add flour (you may need incorporate it with your hands at end of mixing). Cover and refrigerate for about an hour (to firm up dough).
  • Prepare to roll out the doughnuts. I (Jeanne) used a Silpat mat to roll out the dough. You can also dust your cutting board with flour and cut out there. (I would use tapioca flour for this–it won’t add graininess to the dough). You may need to use a little flour for the biscuit cutters so they don’t stick to the dough. (I used the Tapioca Flour/Starch as Jeanne recommended and I also floured the biscuit cutters).
  • Roll out the dough to 1/2″ thickness (be sure it’s not too thin)
  • Cut out doughnuts with bigger biscuit cutter and doughnut holes with smaller biscuit cutter. Or you can just use the smaller one and cut out a bunch of doughnut holes (because they are fun and easy to eat!).
  • While you are cutting out the doughnuts, have the pan of oil on medium-high heat. I use a small saucepan and I do several batches. This is so I don’t have to use a ton of oil. You need to have the oil deep enough that the doughnuts can cook be completely submerged and have oil all the way around them. Oil should be around 360 degrees.
  • Once doughnuts are cut out, test the oil. Drop a bit of extra dough into the oil to see if it fries. If it starts frying immediately, then the oil is ready.
  • Carefully drop doughnuts and holes into oil. They should drop into the oil and start frying. After a couple of minutes, they will rise to the surface.
  • Turn them in the oil to make sure they are being cooked evenly. Cook until they are golden brown.
  • When they are golden brown, carefully take doughnuts out of oil and drain on a plate covered w/paper towels. The doughnuts won’t have absorbed that much oil.
  • Repeat the frying procedure until all the dough is used.
  • We like them as-is, but you can dust them with powdered sugar or granulated sugar, if you want. You can add a little cinnamon to the granulated sugar if you want cinnamon doughnuts.
  • Visit Jeanne’s post for a printer-friendly version of her recipe. She also has a recipe for Gluten-Free Pumpkin Doughnuts that sound delicious!

The following is my photo tutorial for the Powdered donuts. I decided to add more step by step pictures after one of my best friends from back home in Ohio sent me this photo on my cell phone of her Better Batter GF Bagels:

A closer look (I’m sorry Mary, but this is just too good to pass up!):

I laughed so hard, I cried! I thought Mary’s bagel looked like a pretty flower but my husband kept calling it a “Pattypan Squash from Farmville.” Oh, Lordy Pete, this still reduces me to tears, LOL! Just so you know, I have been there too, believe you me! Just look at my pretzel rods! 😉 So Mary, this photo tutorial is dedicated to you, my dear friend!

1 Tbs. Butter (I used Original Smart Balance in the tub, and this may make my outcome different from a batch made with real butter).

Level it off with a knife.

Heat the butter in the microwave until melted. If you cover it with a paper towel, it wont blow up all over the place. 😉

Melted Smart Balance, set aside to cool for a minute before adding to the egg (so you don’t scramble the egg).

In a separate bowl, whisk 1 egg,

When measuring liquids, use a measuring cup meant for liquids. After pouring in the liquid, set the measuring cup on the counter then read for the correct amount (once it stops moving).

Add milk to beaten egg,

Use this type of measuring cup for dry ingredients. This is 1/2 cup of sugar,

Add the sugar to the egg and milk mixture,

When I measure salt, I also level it with a knife:

Baking (even frying donuts) is a precise science, don’t “eyeball” the ingredients.

Add salt to the egg, milk and sugar mixture.

Do the same with the nutmeg, level it with a knife (too much nutmeg can be overpowering).

Add the nutmeg to the wet mixture,

Add the leveled off baking powder to the egg, milk, sugar, salt and nutmeg mixture,

then add the cooled melted butter/Smart Balance, whisk together until well incorporated.

Not quite done,

Now add the flour!

This is some mix that I had stored in my freezer,

Level off 2 cups of the flour mix,

Add the flour to the wet mixture,

Stir to combine.

This is where you will want to use your hands,

And there you have it!

I cover my dough with a slightly damp towel (to keep the dough from drying out), then put in the fridge for about an hour. In the meantime, heat the oil.

Oops, too hot! Reduce heat and allow the temperature to come down to 360° – 365° F.

Flour your work surface,

Pat out the dough to approximately 1/2″ thickness (this is not a sticky, batter type dough, it is easy to handle).

You can use biscuit cutters,

Or a glass, basically anything that is the desired shape and size you want!

Then you need something with a smaller circle to cut out the hole. This is a large pastry tip,

this is an apple corer with a plunger attachment,

which makes it easy to pop out the dough!

Close enough…

I did a test piece with one of the donut holes,

When you first drop in the dough, it will sink to the bottom. When it is close to done, the donut will “float” to the top. At this point, it is essentially trial and error, I have had many donuts that I thought were done, only to see them split as they were cooling with uncooked batter seeping through. If this happens, just put back in the hot oil to cook some more, they won’t be pretty, but they will still taste good!

Remove donut from hot oil with a skimmer, place on paper towel to drain excess oil.

Finish cooking off your donuts, then allow the donuts to drain and cool completely (if you don’t want the powdered sugar to melt into the donut).

These will keep a few days if stored in an air-tight container.

I definitely think Mary and I hit the “gluten-free ugly jackpot” this week! The icing wasn’t cooperating very well, and you have to be careful not to handle the donut too much or the powdered sugar comes off! The “O” cereal eyes you see are Nature’s Path Whole O’s, which are gluten-free. The chocolate chips are Nestle Toll House Semi-Sweet Morsels and the hat is a Hershey’s Kiss.